At Younergy, it is important to us that you not only receive good service but also a system that you will be satisfied with throughout its lifespan. That's why we teach you the little tricks we pay attention to during an installation, which distinguish a quality installation from others and can have a major impact on your positive experience with a solar system. Whether you get a photovoltaic installation from Younergy or elsewhere, here are 10 details you should keep in mind, and that we automatically guarantee with our service.

ROOF TILES
Roof tiles prevent most rain and condensation from entering your home and causing damage, which is why you need to pay special attention to them.
1. Cut, Don't Break
The panels are attached to your roof on rails, which are screwed onto the roof using brackets. These brackets are screwed onto the rafters, and the tiles are then put back on top, but must now have a U-shaped hook sticking out.
To do this, it is necessary to make an incision in the tile through which the bracket can protrude. It is important that this incision is made with an appropriate machine to avoid the tile from breaking.
2. Replace Broken Tiles
Whether previously broken or accidentally damaged by installers, the company should always replace tiles that could compromise the waterproofing of your home.
If you don't have any spare tiles yourself, inform your solar installer of the manufacturer of your tiles well before the installation so they can source the correct model.
If too many tiles are broken, the company should advise you to renovate the roof before proceeding with the installation of a solar system.
Therefore, it's also important for you to have a technical home visit before the installation, during which the condition of the roof will be analyzed by experts.
RAILS
3. Correct Distance
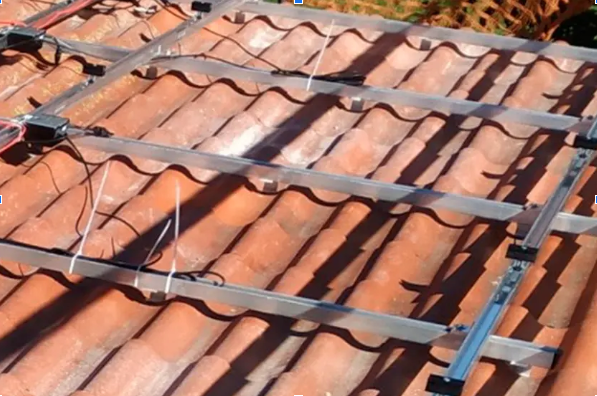
As you can see in the image below, the rails should be installed approximately 3 cm from the roof; otherwise, leaves may accumulate underneath and cause moisture problems. However, the distance should not be too great either, to prevent excessive wind from passing under the panels.
WIRING
Cables are drawn from the solar panels on your roof to the inverter, which is typically installed in the basement. During this step, several details must be considered to avoid being caught by problems.
4. No Contact with the Roof
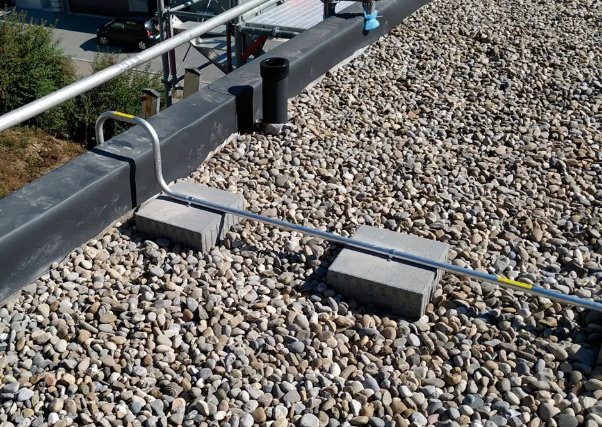
As you can see in the image below, the cables should not, if possible, come into direct contact with the roof, as damage can occur if they come into contact with water. All cables that traverse the roof horizontally must therefore be attached to the metal rails of the installation.
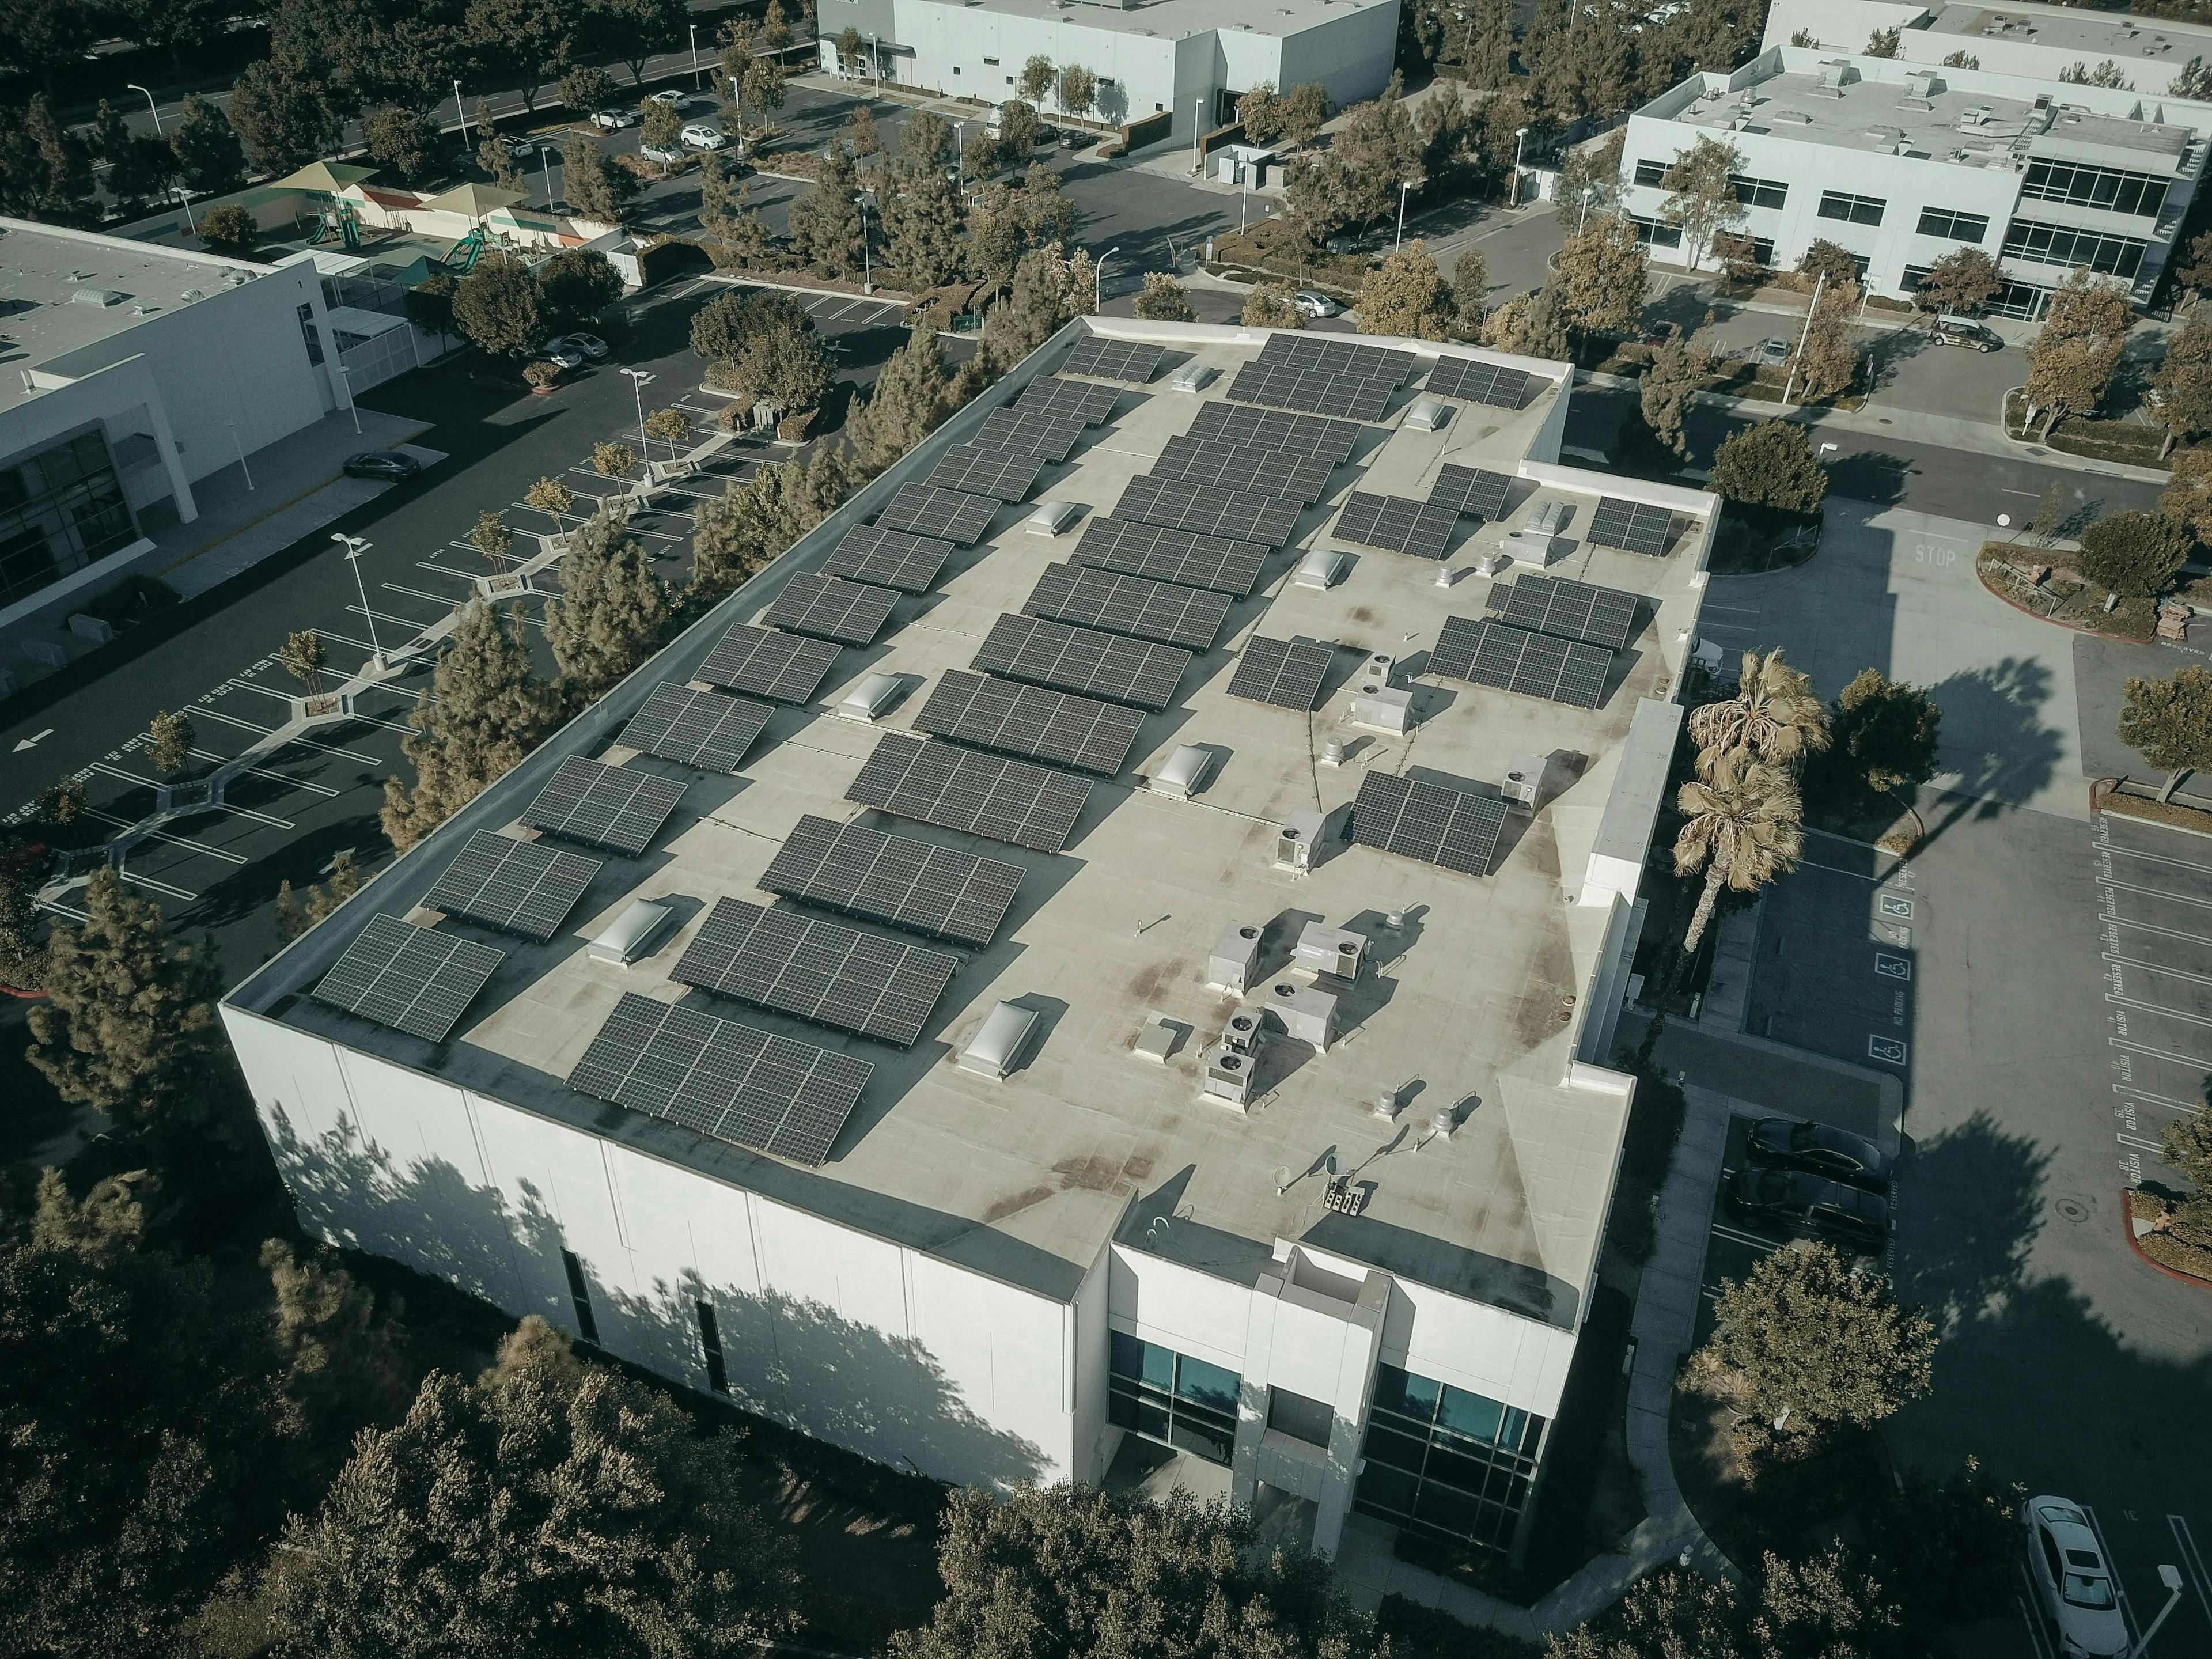
On the other hand, where the cables touch the roof (for example, at the point of entry into the house), they must be routed through protective pipes. The same applies to all electrical devices (for example, power optimizers, visible in the image above, top left), as otherwise water tends to accumulate, which in turn affects not only the system's performance but can also be dangerous.
5. Protection Tubes and Routing External Cables
Flat roofs often (but not always) have an opening through which cables can be routed into the house. When this is not the case (mainly on pitched roofs), the cables must run along the facade in aluminum protection tubes.
Firstly, you must ensure that the aesthetics of your home are not compromised. An ideal location to run protection tubes along the facade is where other pipes have already been installed, for example, next to pipes used to drain water collected by the gutters.
In this picture, you can see aesthetically routing cables within the protection tube
6. Condensed Water
In these tubes used to pass cables and located outdoors, it occasionally happens that condensation forms inside them. To prevent significant damage to the building and the installation, a small hole should always be drilled at the base of the pipe to prevent condensation from forming.
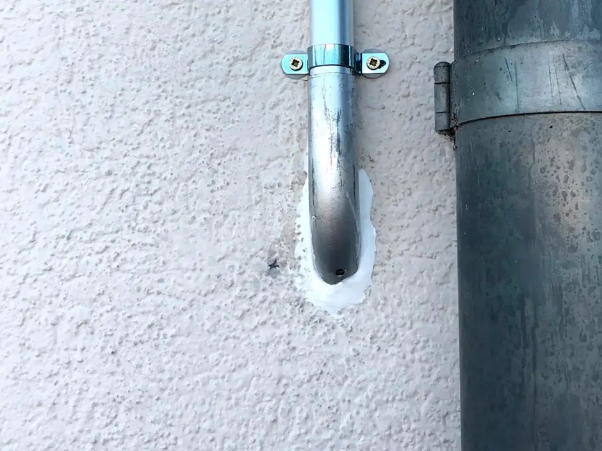
In this image, there is a small hole allowing condensation to escape before the protection tube enters the building. The protection tube is also positioned directly next to a rainwater downpipe to minimize the alteration of the building's appearance.
7. Roof Entry
When cables enter the building through the roof (which is always preferable to maintain the appearance of the building rather than running the cables along the exterior wall), installers can install special mounting elements, depending on the roof covering, as shown in the image below.
These provide additional security and protection against moisture but may not be usable in all cases. During the technical visit, it is best to ask the company about the available options.
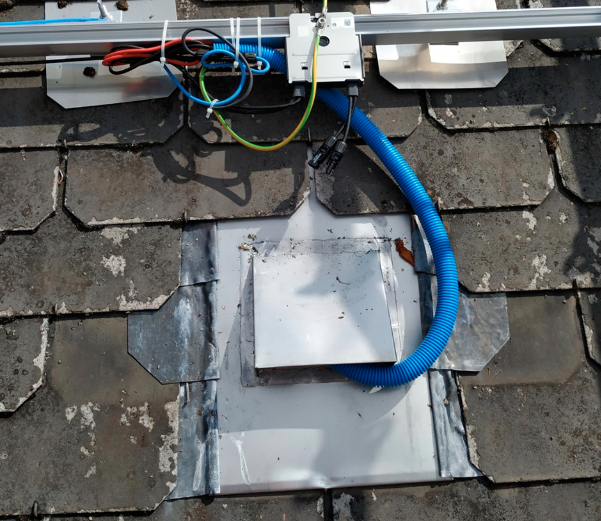 Here, you can see a special device to facilitate the entry of cables onto the roof, bundled within the blue plastic protection tube.
ELECTRICAL INSTALLATION
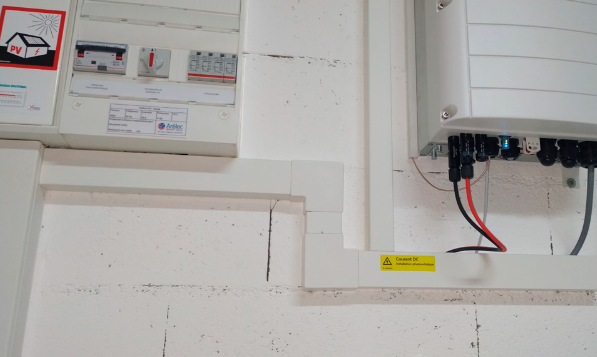
8. Surge Protection Device
Surge protection devices, as shown in the image below on the right (L1, L2, L3, N), are only recommended if the building does not already have a lightning protection system on the roof. Nonetheless, it's good for your solar partner to install them for additional protection of the solar system and your building.
It's always better to make an extra effort than to save. Such an installation costs no more than 130 Swiss francs, but during a thunderstorm, you can sleep soundly knowing that your electrical appliances won't be damaged in the event of lightning.
9. A technically and visually clean installation
The same goes here: Are the installers willing to make an extra effort and ensure that your system not only works but is also visually appealing? Where possible, the wiring should again be routed within a protective conduit, not only for aesthetic purposes but also for safety and functional maintenance.
10. You
We are installing a system at your place that will enable you to be more independent for over 20 years. Therefore, it's important that you are fully involved with us. Take advantage of the presence of our advisors and experts to ask all your questions to ensure that this installation is exactly what you need. Once the installation is completed, all you have to do is start your system!